
How WordPress Image Sizes Work: A Complete Beginner’s Guide (2026)
How WordPress Image Sizes Work
When you upload a picture to your WordPress site, WordPress automatically generates numerous versions of that image in various dimensions. These versions, known as WordPress image sizes, allow your website display the most appropriate image based on where it appears.
Many beginners are surprised to find that uploading a single image can generate several additional image files. This is completely normal and is designed to improve website performance, responsive design, and user experience.
Understanding how WordPress image sizes work can help you optimize your media library, reduce storage usage, improve website speed, and display sharper images across desktops, tablets, and mobile devices.
Whether you run a personal blog, business website, portfolio, or WooCommerce store, learning how WordPress handles image sizes will help you make better decisions when uploading and optimizing your images.
In this guide, you’ll learn how WordPress creates image sizes, what each default size is used for, how themes create additional image dimensions, and the best practices for managing images efficiently.
What Are WordPress Image Sizes?
WordPress image sizes are automatically generated versions of an uploaded image. Instead of storing only the original file, WordPress creates several copies in different dimensions so that the most suitable image can be displayed throughout your website.
For example, if you upload a large image measuring 3000 × 2000 pixels, WordPress may generate smaller versions such as a thumbnail, medium, and large image. These resized copies are stored in your uploads folder alongside the original image.
This automatic image generation allows WordPress themes and plugins to display appropriately sized images without loading the original high-resolution file every time.
Original Image Uploaded
3000 × 2000 px
⬇ WordPress Automatically Creates
- Thumbnail Image
- Medium Image
- Large Image
- Original Full-Size Image
Why Does WordPress Create Multiple Image Sizes?
Loading the original image on every page would significantly increase page size and slow down your website. Instead, WordPress selects an image size that best fits the available display area.
For example, a small thumbnail displayed on your homepage doesn’t need a 3000-pixel-wide image. Using a smaller version reduces file size, improves loading speed, and saves bandwidth.
This automatic resizing provides several important benefits:
- Faster page loading
- Improved website performance
- Better Core Web Vitals
- Reduced bandwidth usage
- Responsive images for different screen sizes
- Improved user experience
- You upload an original image.
- WordPress stores the original file.
- It creates the default image sizes (Thumbnail, Medium, and Large).
- Your theme or plugins may create additional custom image sizes.
- All generated images are saved inside the wp-content/uploads directory.
- photo-150×150.jpg
- photo-300×200.jpg
- photo-1024×683.jpg
- Original photo.jpg
- Featured Image
- Hero Banner
- WooCommerce Product Image
- Portfolio Thumbnail
- Homepage – Featured images and post thumbnails.
- Blog Archive Pages – Thumbnail or medium-sized images.
- Single Blog Posts – Medium or large images within the content.
- WooCommerce Product Pages – Product thumbnails, gallery images, and zoom images.
- Image Galleries – Optimized thumbnails and medium images.
- Portfolio Pages – Custom image sizes created by the active theme.
- Log in to your WordPress Admin Dashboard.
- Go to Settings → Media.
- You’ll see options for:
- Thumbnail Size
- Medium Size
- Large Size
- Enter the desired width and height for each image size.
- Click Save Changes.
- Featured images
- Homepage sliders
- Portfolio layouts
- WooCommerce product galleries
- Magazine-style layouts
- Uploading images that are much larger than necessary.
- Using full-size images throughout the website instead of optimized sizes.
- Ignoring image compression before uploading.
- Changing Media Settings without regenerating existing image sizes.
- Deleting generated image files manually from the server.
- Uploading images without descriptive file names.
- Forgetting to add meaningful alt text for accessibility and SEO.
- Not testing how images appear on mobile devices.
- Thumbnail (150 × 150 pixels by default)
- Medium (300 × 300 pixels by default)
- Large (1024 × 1024 pixels by default)
- Full Size (the original uploaded image)
- Resize images to the ideal WordPress dimensions.
- Compress images to reduce file size while maintaining quality.
- Crop images for featured images, blog posts, and social media.
- Convert images between JPG, PNG, and WebP formats.
- WordPress automatically creates multiple image sizes from every uploaded image.
- The default image sizes are Thumbnail, Medium, Large, and Full Size.
- Themes and plugins can generate additional custom image sizes.
- Using the correct image size improves website speed and user experience.
- Compressing and resizing images before uploading helps reduce storage usage and improve performance.
- Regularly review your Media Settings to ensure your image sizes match your website’s design and requirements.
In addition, many WordPress themes and plugins create their own custom image sizes to ensure featured images, galleries, sliders, and WooCommerce product images display correctly without stretching or distortion.
Default WordPress Image Sizes
By default, WordPress creates several image sizes whenever you upload an image to the Media Library. These default sizes are designed to display images efficiently in different areas of your website.
| Image Size | Default Dimensions | Typical Use |
|---|---|---|
| Thumbnail | 150 × 150 px | Blog lists, galleries, widgets |
| Medium | 300 × 300 px (default) | Content images and blog posts |
| Large | 1024 × 1024 px (default) | Featured images and larger content areas |
| Full Size | Original uploaded image | Downloads or full-resolution display |
Note: The Medium and Large dimensions shown above are WordPress defaults. Website administrators can change these values in Settings → Media, and many themes or plugins add their own custom image sizes.

Understanding Each WordPress Image Size
Thumbnail Image
The thumbnail image is the smallest version generated by WordPress. It is commonly used for blog archives, recent posts widgets, category pages, image galleries, and other locations where small preview images are sufficient.
Since thumbnail images are much smaller than the original upload, they load quickly and help improve overall website performance.
Medium Image
The medium image size is typically used within blog articles or content sections where a moderately sized image is needed. It provides a balance between image quality and file size.
Using the medium image instead of the original file can significantly reduce page weight while maintaining good visual quality.
Large Image
The large image size is commonly used for featured images, banners, landing pages, and larger content sections. It offers higher resolution than the medium size while remaining much smaller than the original uploaded image.
Many modern WordPress themes automatically use the large image size for featured images to improve loading speed without sacrificing appearance.
Full-Size Image
The full-size image is the original file you uploaded to WordPress. No resizing is applied unless the image exceeds WordPress’s maximum upload scaling limits.
Although full-size images provide maximum quality, they are also the largest files. Using them unnecessarily can slow down your website, especially if the original image has very high resolution.
How WordPress Generates Multiple Image Sizes
Whenever you upload an image, WordPress automatically processes the file and creates multiple versions based on your Media Settings and any additional sizes registered by your active theme or plugins.
The process works like this:
Original Upload:
photo.jpg (3000 × 2000 px)
WordPress automatically generates:
Your theme may generate additional image sizes such as:
Where Are WordPress Image Sizes Used?
Different parts of your website use different image sizes automatically. This helps WordPress load the most appropriate image instead of always displaying the original file.
How to Change WordPress Image Sizes
WordPress allows you to customize the default image dimensions according to your website’s needs. This is useful if your theme requires different image sizes or if you want to optimize storage space and website performance.
Method 1: Using Media Settings
The easiest way to change the default image sizes is through the WordPress dashboard.
These new settings will apply to images uploaded after you save the changes.
Method 2: Custom Image Sizes in Themes
Many premium and free WordPress themes register their own image sizes to support features such as:
These custom image sizes are generated automatically when you upload new images, ensuring they fit your theme’s design without stretching or distortion.
Method 3: Using Image Optimization Plugins
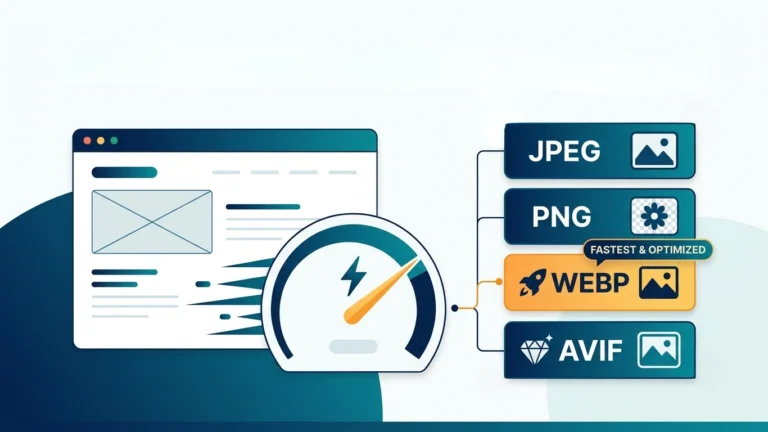
Some WordPress plugins can resize uploaded images automatically, optimize file sizes, generate modern image formats such as WebP, and remove unnecessary image dimensions to save server storage.
These plugins are especially helpful for websites with large media libraries or eCommerce stores that upload images regularly.
What Happens If You Change Image Sizes Later?
Changing the image dimensions in Settings → Media does not modify images that have already been uploaded. Only future uploads use the new dimensions.
If you want older images to match the new settings, you’ll need to regenerate image sizes so WordPress creates updated versions based on your current configuration.
Best Image Sizes for Different Types of WordPress Websites
| Website Type | Recommended Image Width | Notes |
|---|---|---|
| Blog | 1200–1600 px | Suitable for featured images and article content. |
| Business Website | 1600–1920 px | Ideal for banners and hero sections. |
| WooCommerce Store | 800–1200 px | Provides clear product images while keeping file sizes manageable. |
| Portfolio | 1600–2000 px | Useful for showcasing high-quality work. |
Common Mistakes When Managing WordPress Image Sizes
Frequently Asked Questions (FAQs)
What are the default WordPress image sizes?
By default, WordPress generates four primary image sizes when you upload an image:
These dimensions can be customized from Settings → Media.
Can I change WordPress image sizes?
Yes. WordPress allows you to modify the default Thumbnail, Medium, and Large image dimensions from the Media Settings page. These changes apply to newly uploaded images.
Why does WordPress create multiple copies of the same image?
WordPress creates multiple image sizes so your website can display the most appropriate version in different locations, such as blog posts, galleries, widgets, and featured images. This improves loading speed and reduces unnecessary bandwidth usage.
Do themes create additional image sizes?
Yes. Many WordPress themes and plugins register their own custom image sizes for sliders, featured images, WooCommerce products, portfolios, and other design elements.
Can I delete unused image sizes?
You can remove unnecessary image sizes, but it should be done carefully. Deleting image files that are still required by your theme or plugins may result in missing or broken images on your website.
What is the best image size for WordPress?
There isn’t a single ideal size for every website. A width between 1200 and 1600 pixels is suitable for many blogs, while hero banners and full-width sections may require larger images. The best choice depends on your theme and layout.
Conclusion
Understanding how WordPress image sizes work is essential for building a fast, responsive, and professional website. By automatically generating multiple image sizes, WordPress ensures that visitors receive appropriately sized images without downloading unnecessarily large files.
Choosing the correct image dimensions, avoiding oversized uploads, and using optimized images can improve website performance, reduce storage usage, and enhance the user experience across desktops, tablets, and smartphones.
For even better results, combine properly sized images with image compression, modern formats such as WebP, browser caching, and a CDN. Together, these techniques can help your WordPress website load faster while maintaining excellent image quality.
Optimize Images Before Uploading to WordPress
Before uploading images to your Media Library, use ImageToolkitPro to prepare your files for better performance.
With ImageToolkitPro, you can:
Optimizing your images before uploading helps improve page speed, reduce bandwidth usage, and create a better experience for your visitors.